Monday, July 26, 2010

New Pattern: Qina Eye Pillow

Qina Eye PillowHaving trouble taking an afternoon nap because of the sun shining on your face?

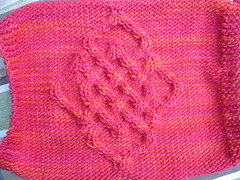
Then this eye pillow is for you!

Don't I look happy and relaxed using it? I hope so because taking your own picture when your eyes are covered isn't easy.

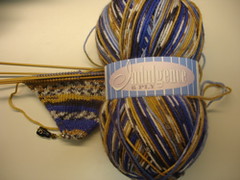
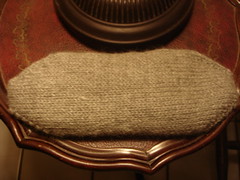
The pattern calls for one skein of Qina by Mirasol. This yarn is 80 percent Baby Alpaca and 20 percent Bamboo. It is soft and snuggly with good drape, perfect for hiding your eyes after a rough day.

The yarn comes in 50g/83m/91 yard skeins. The prototype actually took just over half the skein (measured by weight). This leads me to suspect you can probably make a second, smaller one although I haven't tried yet. I used color 922 "Silver Fox" because it is actually for Hubby. You can see the other colors here.

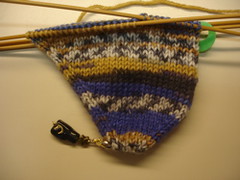
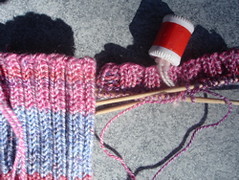
The label suggests you work the yarn on US 6 needles at 5 sts/inch. However, I call for working it on US 4 needles at 6 sts/inch in order to get a dense fabric so the flax seed and lavender stuffing won't slip out. Despite being worked at the smaller gauge it is still soft and snuggly.

Easy Peasy
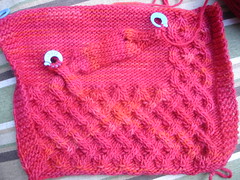
This project is suitable for an advanced beginner with experience working in the round on double points. I wrote it assuming you know how to work Judy's Magic Cast On, which is what knocks it into the "advanced" category. The middle is plain stockinette stitch. The opposite end is closed using Kitchener stitch.

This makes the two ends uniform, in my mind.

If you are a raw beginner, or don't feel like fussing with JMCO, you can always use the long-tail cast on instead. You'll have to sew the CO edge shut at the end. Obviously you'll have to wait to stuff it. I'd suggest still Kitchenering the opposite end shut, then stuff it, then sew the CO shut.

The increases and decreases used were also selected with stuffing control and a uniform appearance in mind.

The increases are simple KFB (knit front and back) to minimize holes.

The decreases are simple K2tog and SSK, but I've "feathered" them by placing them against the fabric grain so they are less noticeable.

Did I just loose you? Qina Eye pillow
You know how when you work a sock toe you usually SSK at the beginning of a needle and K2tog at the end resulting in a nice crisp ridge? Or when working the armhole shaping on a sweater you lean the stitch toward the center to get a nice detail?

Well, I've done the opposite. I have you work the K2tog at the beginning of the needle and the SSK at the end. This breaks up the line and prevents the ridge forming.

It would have looked silly to have ridges on one end and none on the other!

Stuff it!
This project came about because I had to refresh a commercial eye pillow with fresh lavender. That pillow was just filled with flax seed. After I mixed my lavender buds in I had more than I needed to refill the pillow.

Flax seed should be available at a health food store. My original pillow had about 7 oz in it.
For lavender buds check your local farmers market. I got mine at Lavender by the Bay in Long Island. It looks like they do mail order. Hubby was there in person and bought me a half pound bag. So, yeah, I need to find more uses for dried lavender!

Other options would be the flax seed with some drops of essential oil. Or plastic stuffing beads from the craft store with essential oil. The list goes on.

I did not line my pillow. Hubby may live to regret my decision. However I was fussing with it quite a bit while stuffing it and kept squeezing and squishing it and nothing leaked out.

Still, you can always make a liner with some thin cloth just to be safe. I can't sew to save my life, so you're own your own with that one.

Get It Here
I think that's about all there is to tell you about the eye pillow. Small, sweet, and simple. What more could you ask for? Oh, right, it's free! (when you click "it's free!" a pdf download will launch. Or you can find it on Ravelry.)

Friday, July 16, 2010

Design Class, part 2

Celtic Critter Cardigan back swatch Returning to the idea of a blog as being as much a journal of what I've learned for my own reference as it is a public exhibition for the amusement of others, I shall tell you about the second half of the Shirley Paden Design class at Westport Yarns last night.

In the last class she walked us through designing the sweater body and the sleeve up to the cap shaping.

In this class she picked up more or less where she left off. We reviewed a double-taper body style with a discussion of fudging the decrease or increase start and finish points to make them land on appropriate parts of the sweater.

Being Sneaky
Having explained a crew neckline in the last class, she attempted to explain a V-neck this time.

I say attempted because we were all a bit math challenged. It's pretty simple math, but we all sat there and said, "Huh?" I put it down to end-of-day brain fatigue.

The way she runs the class is to give you sample gauge and measurements, then walks you through crunching the numbers to calculate stitch and row counts. Obviously she has the answers so she knows what is supposed to happen.

When we all came up short on her sample V-neck numbers she said, "Ok, let's try a different one, give me some numbers."

Since everyone else was sitting there paralyzed with math-fear, I started calling out the numbers for my Bias Striped V-Neck Shell. Now, if you remember, I had a devil of a time figuring this out because no formula I had access to seemed to work. I already suspect I'd done it wrong and her example reinforced that suspicion. Here was an opportunity to have someone do the math for me!

Well, Shirley got two steps into it and immediately said it wouldn't work. She didn't even bother writing all the calculations out. She said there were too many stitches for too few rows. Huh. So right there I learned something valuable. She said I would have to do a deeper plunge. By then people were a little energized, so they gave some alternate measurements for us to work.

Cross Back
Unfortunately I can't actually use the new numbers we came up with in class.

During the last class Shirley had said not to include ease in the cross-back measurement. She said that shoulder seam should be accurate to the body for the sweater to look good.

I did not know this when I originally designed the Bias-V, so I had included 2" of ease in the cross-back to match the 2" of ease in the bust. Meaning I have to redo the entire top of the sweater.

This shouldn't be too painful as it should only be around two stitches each side.

Cap It
After we got past the neck shaping we moved onto the sleeve cap shaping. Lynn and I were really looking forward to learning it.

I had attempted to follow the book, but it boggled my little mind. Which, apparently, isn't hard to do. Frankly, the first time Shirley explained it was still like, "Huh?" But after she reviewed all the steps, and handed out the answer sheet, it started making sense. You figured out the bottom, which matches the armholes on the sweater, then the top, and decrease away whatever is left in the middle.

It's just getting to that middle that's the mind bending part.

I shouldn't have to worry about it for a while though, which might be a shame on some level since I won't get to practice.

The Bias-V is slated to be sleeveless until I know how much yarn I have. I'm not going to design sleeves until I know I can knit sleeves.

I thought I'd be applying this new sleeve cap knowledge to the Celtic Critter Cardigan, but it's not looking that way now.

Swoon! A Consultation!
An important part of the class is a "private" consultation with Shirley if you are far enough along in your pattern.

I say "private" because it's right there in front of everyone, but she's focused on you for the moment.

Anyway. I got to the store early since I'd gone straight from work. She also arrived about half an hour before class started, so I took the opportunity to show her my numerous, large swatches.

She said they were very nice. She might have even used the word beautiful.

I asked her about the cross-back measurement and if the no ease thing holds true since I'm designing a coat to go over other clothes. She said it does since that part of the sweater fits (rests on the body) differently than the bust area does.

Right there I have to rework my numbers. Celtic Critter Cardigan 1wdragon

I told her about the stitch count exploding because of the cable style I'm using. I said my current numbers call for 17 stitches on each shoulder but my cable needs 16. She suggested I do a drop shoulder or modified drop shoulder instead, which will get around the need to shape the area. I would still decrease stitches under the arm, and still have to rework the top in general, but I might get a bit more wiggle room.

She also questioned why I have two purl stitches between the border and the cable. I was like, "They are in the pattern." She was like, "Pifff! The pattern is just a starting point."

Of course, that would mean I have to swatch again to make sure I like how it looks.

Show Off
A few other people had projects that needed a consultation at the end of the class. There was a pretty mesh dress and a top with a lace hem.

Then Shirley told me to haul out my swatches again. Everyone crowded around and admired them and I got to explain all about the sweater concept.

Their eyes bugged a bit when they saw the number and size of swatches I had made. "I'm just going to sew them together and call it a day," I assured them, to general amusement.

A few people questioned if the center back motif was going to be big enough. Even though it is 5" by 6" it doesn't look that big in isolation. However, they weren't taking into account how petite I am. When I held it up to my back they agreed it would be just fine.

Other suggestions were made for adding cables or motifs to other area. I've taken them under consideration, but won't really know how it will all fit together until I start knitting.

Now I just have to get through a little more math then I can plunge in.

Thursday, July 8, 2010

Indulgence Socks

Indulgence In the box of yarn I'm supposed to be reviewing on my blog (I know you've been overwhelmed by such posts, bear with me. ha!) is a skein of Indulgence 6 Ply from Knitting Fever Inc.

Or should I say "was a skein" since I have obviously removed it from the box?

Anyway.

Although I've never used this yarn before, my trained eye immediately recognized it as a self-patterning yarn. I do like a self-patterning sock yarn.

Confirming my suspicions was the pair of completed socks right next to it. hehe. Those socks happened to fit Hubby. He spirited them away. Now the only time I see them is when they cycle through the laundry, which is why I don't have a picture for you.

The yarn is 75% Extrafine Merino Wool and 25% Polymide. 426 yard ball. Machine washable. With a suggested gauge of 21 sts and 27 rows 4 inches on a US3.

Oooh, Snuggly
This yarn is sooo soft and snuggly! Which is part of the reason Hubby ran off with the socks. However the whole point of the nylon content is durability, so I'm imagining it will wear well. Hmm, I should check the socks Hubby stole. He's worn them at least three times by now.

Obviously a pair of socks was in my future. Plain stockinette stitch socks are my preference for self-patterning sock yarns since the colors do all the work. However, I didn't want to have matching socks with Hubby.

My Size?
I was enamored of the Skew sock pattern from the Winter 09 issue of Knitty when the pattern came out because of their interesting construction.

However, I was hesitant to make them because of that construction and being unsure how to resize them for my wee feet. I wear a US woman's 6. My feet have an 8" circumference, which seems to fall in the "average" range for patterns, but most patterns as written are a bit big for me. pout. I like 1" of negative ease, for a 7" circumference sock.

The designer has notes on her blog about making the socks bigger, but none about making them smaller. pout, again.

Luckily, other staff members at the store have normal size feet (grin) and jumped right on this pattern. When Danni made hers she very nicely let me try them on, which confirmed my suspicion they would be baggy. We discussed resizing options and I forgot about them.

Then I saw that Westport Yarns was running a class for the pattern. Since it is the Summer of Socks, after all, I figured it was the nudge I needed to make them.

The first class was last night. It was grand fun shirking responsibility to hang out and knit. Giggles and I sat in on the class in order to heckle and knit along.

DPNs FTW!
As you can see, I'm working mine on double points. The pattern specifically advises against it. Pam was leading the class and urged the students to consider magic loop or two circulars. She said Danni started them on dpns and had to switch, but we are assuming Danni was on 5". I'm using 8" needles.

Since Giggles and I are experienced sock knitters, and the peanut gallery, we were allowed to dig our own graves for needle choice. Giggles went magic loop.
Skew toe
Although it was jumping ahead in the pattern, we discussed fit and decided I should drop my stitch count by a sixth. (yep. 1/6). Therefore I stopped increasing the first part at 40 stitches and the second part at 60 stitches. It isn't big enough to try on yet, so I'm not sure if our guess worked.

Back to the Yarn
This Indulgence yarn is really nice to knit with.

Have I mentioned that it's soft?

To show you can trust my review, even though it is contracted, I'll admit the yarn was just a tiny bit splitty while working the toe. But I think that was a matter of using Judy's Magic Cast On and US1 needles as much as anything. I mean, those conditions would be tough on any yarn. Now that I've got a few rows under me the issue has gone away. I bet it would have been just fine if I was knitting a straight sock.

That's about all I can tell you, since I've only just started knitting.

I will leave you with the thought that if I could get my hands on enough of this yarn to make a sweater, I would totally do it.

Wednesday, July 7, 2010

Celtic Critter Cardigan: Math Sucks

Celtic Critter Cardigan back swatch But I believe I've expressed my views on that point in the past?

During each of the three times I've sat down to design my own sweater I have at some point asked myself, "Why? There are so many lovely sweater patterns in the world already. Why not just make one of those?"

And I never have a good answer. ("Because I can," doesn't count.) Oh, sure, they might not be quite like what I had in mind, but they are perfectly fine.

This is the conversation I had with myself over the weekend when I tried to squeeze in some yarn time when I wasn't abusing our plant life.

Stitch Count Explosion
Part of the problem is the way these cables I've selected are constructed.

I don't know if you could really tell in those other pictures, but they aren't like normal cables. they don't start politely at the hem and march up the sweater.

No, they have cleverly placed increases so they spring out of nowhere, snake up the sweater, and then decrease to disappear again.

This means that your stitch count explodes from 216 to 416. wheeee!

Oh, have I mentioned I plan to work it in one piece to the armholes? That is why the number is so high.

Actually, it took me an effort to get to 216. Originally I had 220, just based on the st st gauge. Since I wasn't sure how many repeats that would be, or how they would fall out, I went ahead and cast on and worked the first two rows of the pattern. It may have taken awhile, but I think it was quicker than trying to draw out a chart would have been.

Turns out the cables didn't break nicely around the "side seams." However, seeing it like that allowed me to quickly see how many stitches to increase or decrease to adjust it. With the 216 each side seam lands plunk in the middle of a repeat, which will play in nicely into the side cables.

And it is those side cables, along with the cables along the front opening, that are causing my math issues.

Just Ignore It
Originally I thought, "Oh, sure my stitch count doubles for the cables, but it will go back down when they end."

I thought I would just ignore the extra stitches. Remove the 28 rows and 3 1/2 inches for the bottom hem from my calculations and move ahead.

Then I realized I can't ignore them because some of the cables, and their extra stitches, are continuing up the cardigan. argh! That's what I get for being so clever.

My sweater will increase by 32 stitches (if my quick math just now was correct). To complicate things, 8 of those stitches will disappear shortly before the underarm shaping occurs.

And then, because I'm terribly clever, they will reappear on the front after the armhole shaping starts so the side cables can join up with them and the whole mess can go up the shoulder.

(oh, it's going to be a work of magnificence and beauty, if I ever get it knit and I don't run out of yarn.)

So Ignoring Is Out?
Part of me still wants to ignore the extra stitches and do the math on the base st st gauge. How far off will it be, right? The cables draw in (a little), the fit should be close to the goal. I am making it over sized so I can wear it over things.

However, it occurs to me that if I have fake numbers like that and then have to count my stitches to correct a mistake I'll never know whether or not I'm right.

sigh.

I'm going to do my best to come up with real numbers. I'm going to figure out where these little stitch explosions occur and plan accordingly. And I'm going to figure out the row counts so I can plan for the cables to disappear in pleasing places. Finally, I'm going to work the decreases two stitches in from the cables, since I'm going to have cables where the decreases would normally go (see? clever.), to try to keep the shaping correct.

But I tell you one thing I'm not going to do.

I'm not going to account for the extra stitches from the back motif.

Screw 'em. The motif is only 5 inches tall. Those extra stitches aren't hanging around long anyway.

Tuesday, July 6, 2010

Timber!

Warning: No knitting content ahead, although Samson and Baru get mentioned.

Note: Yeah, I know this is supposed to be a blog mainly about knitting/crocheting with an occasional mention of my doggies, but I like to share of topic events that I think will amuse you (usually at my expense) and because it's good to stretch my writing muscles.

There was very little knitting or sweater designing for me over the long weekend. Hubby had declared that we would do Massive Amounts of Yardwork in an attempt to undo the effects of our regular neglect.

On one level I know I shouldn't complain because, really, Hubby does all the hard work and I just follow around cleaning up after him and doing the detail stuff.

Leverage Knowledge
In preparation of this monumental task I asked my friend Giggles from the yarn store to come give us some advice. Not only does she make those awesome project bags I wrote about a few months ago, but she has a degree in, like, landscape management or something. In fact, I think she used to run, or even own, a landscape company. So I was totally taking advantage of her expertise.

She very kindly did not laugh at us and our overgrown shrubs at all. She told us where to clip, how to prune, and what to take out entirely. My favorite part was when she said, "I find that just removing the dead branches makes a shrub look maintained." She delivered this in a deadpan without the least amount of judgment.

Fortunately for me I was working at the yarn store Saturday. By the time I got home Hubby had done the grocery shopping and worn himself out mowing, weed whacking, and hedging and was ready to call it quits for the day.

I took the opportunity to mix up a batch of bread starter.

Timber!
I was not pleased at all the next morning when the starter showed no signs of life. I put it down to the fact the house was in the low 70s F due to our central air. So I stuck it on the porch in the sun for a few hours.

A bit of advice we were not surprised to receive was to take down the tree at the end of the yard that was infested by a grape vine.

Hubby rented a chainsaw and we had at it. He chopped and I dragged the debris off to the side for disposal.

Boy howdy, chopping down trees is hard work and I wasn't even doing the work!

Because of the dangerous nature of our activity, we left Samson inside. He protested loudly as he was sure us monkeys couldn't manage something like chopping down a tree without a canine supervisor. When we stopped for a break about halfway through and let him out of the house he immediately ran over and peed on the stump.

Thanks, pup.

I also took the opportunity to mix up my bread dough, but I only kneaded it for about five minutes since I had to save my strength for yard work.

Total Collapse
Not the dough, me.

Did I mention it was like a billion degrees F all weekend? And we were busting our butts outside in the heat. Of course I worked right along side Hubby because I am Not a Princess, but it turns out I am a Delicate Flower.

Hubby had the stump chopped up by 4 pm. Then he sent me to the shed for something, which was like an oven. I came back declaring I'd just been sick from the heat and I was done for the day.

After taking I cold shower I flopped into bed and fell asleep. Hubby must have been keeping an eye on me because after a few hours he woke me up for dinner. I finally admitted I had woken up with a headache and being in the sun all day didn't help.

Then I promptly fell asleep on the couch.

When I finally woke up around 9 pm I stumbled out in the kitchen to check my bread dough. It had risen quite a bit. However, I knew I couldn't face shaping and braiding it. All I could manage was dividing it in two and forming it into ovals. I sprayed the tops with olive oil, covered it with plastic wrap, and stuck the whole mess in the fridge.

Then I went to bed for real.

Back in Action
I was pleased when I woke up Monday morning with no whiff of a bad head.

The pups and I charged downstairs and took the dough out of the fridge so it could come to room temperature before I baked it.

Shortly after I let the dogs out I heard Baru barking his head off. Yep, you guessed it, he was barking at the lack of tree. Poor dog just can't handle change. You might remember how strenuously he objected to the new air conditioner compressor.

I don't know if it was the lack of tree, the new view, or what, but he wasn't happy. However, by the afternoon he had come to terms with it.

Can't say I blame him, though. The tree being gone really changes the look of the backyard. Almost makes it look bigger somehow.

By the time Hubby stumbled downstairs the bread was baked. It turned out well, despite the sever neglect. I imagine it was saved by the long slow rising times it had due to the low temps in the house and then being in the fridge overnight. Still, I wouldn't want to risk trying to duplicate the process. Especially the headache part.

Detail Work
We swung back into action. I was posted on the front shrubs doing detail pruning of removing dead branches and old flowers. It was very tiring work in it's own way. I did my best to be all philosophical about it by focusing on the task at hand and doing the best I could. With the sun beating down on my head the mind set didn't keep me from getting really hot.

Samson said it was pretty hot, too, but he got to lay down on the fresh dirt exposed under the bushes by all our trimming and raking.

After over an hour of work I told Hubby I was really hot and needed a break. He agreed. We went into the backyard, stripped down to our undies, and hosed each other off. It was a mix between "Holy Smokes! That's Cold!" and "Oh Man! That feels sooo good, spray me again."

We decided that if we were that hot Samson must be too, so I called him over and hosed him down. He had the same reaction we did. He let me spray him, then stepped way, shook off, then turned right around and trotted over for another go. I made sure to get his head and chest really well. The second time he ran up on the porch to shake off and didn't come back until I put the hose down. Clever puppy.

After the break was over we tried to leave Samson inside, but he barked at us so we had to let him out. However, he spent most of the rest of the afternoon snoozing on the front porch. It's well shaded and I guess the concrete floor was a little cooler.

He was so tuckered out from his hard day of supervising us that after dinner he hopped up on the love seat with me and passed out. He didn't even budge when I got up to make my tea. (Usually both dogs follow me expecting to be let out.)

I was pretty tuckered out too.

The yard looks loads better, but there is still work to be done. If I'm lucky Hubby is knocking out the rest of it (or most of it) today while I'm at work. hehehe.

Of course, once the outside is cleaned up he'll turn his attention to the inside. There is no rest for the wife. That's the trouble with being married to a teacher. They have waaay to much time on their hands in the summer.

Thursday, July 1, 2010

Pink Static Socks: Only Two Tries

pink static cuffs The first Pink Static Sock is done.

Which led to me casting on for the second sock. Funny how that happens.

I'm pleased to report that I make only two attempts to get the stripes to match.

If you remember my herculean efforts (i.e., four) to get the last pair of socks I made for Hubby to match you will know what a breakthrough keeping it to two is for me.

Not that you can tell from this picture, but the color changes are fairly long, so it was easy to pinpoint where the first sock left off and the second should pick up. Happily, the first toe ended shortly before the point where the stripe sequence should start for the second sock.

Did that make any sense? I've been up since 2 a.m (insomnia much?) so I know I'm a wee bit incoherent.

In fact, I probably shouldn't attempt to write anymore.
blue static done
Anyway. I targeted a point, cast on, and knit three rows. When I saw they didn't quite match, I counted out how many lengths that took and was able to choke up accordingly.

They aren't exact, but they were "close enough" so I let go and kept knitting. In fact, I kept knitting for like 30 rows. Guess I should have updated the picture.

Did I mention I didn't sleep well last night?

I leave you with a finished object picture of the Blue Static Socks, which I finished ages ago but never photographed.