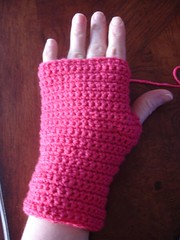
 Why should crocheters be excluded from the fun of making and wearing fingerless mitts?
After all, they can fold a square in half and seam it shut just as well as any knitter can. Better, maybe, since crocheting a seam shut is so much easier than mattress stitch.
I would take a moment to mention that I've been crocheting since I was a child. I was so young when I learned that I don't remember being taught! Although I remember my grandmother teaching me the double crochet stitch, which leads me to believe she taught me in the first place.
Anyway, you don't see me crocheting much because extended crochet sessions hurt my wrists. booo! Knitting does not, unless I really, really over do it.
Happily, these little mitts only took a few hours to work up so I think I escaped unscathed.
Sizing
Let's put the sizing discussion up front today, shall we?
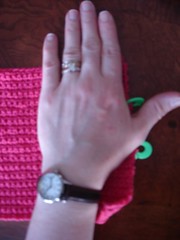
This finished mitt has a circumference of 8". My hand, as we established yesterday, is 7.25" around. That's a lot more ease than I like in my mitts, but if your hands are bigger than mine you might be fine.
Single crochet fabric isn't elastic in the way knit ribbing is. These mitts aren't going to cling for me.
To size for yourself you might want to do a little math. I got a gauge of 4.5 sc per inch. Multiply that by my 7" hand and I get 31.5. So I should have gone with either 31 or 32 sts for fit consistent with what I prefer (i.e., snug).
Clear as mud? Excellent.
Yarn Quantity
Then next thing to consider is that crochet takes 1/3 more yarn than knitting does. While the knit mitts yesterday only took around 11 grams of yarn each, leaving wiggle room for resizing with a single ball, this single mitt took 22 grams out of a 50 gram ball.
These mitts, at these dimensions, will very likely use up the entire ball of yarn. If you will be resizing at all you'll want a second ball. Don't say I didn't warn you.
Let's get down to business! I think this pattern will be suitable for a beginner. You just need to know how to chain, single crochet, and slip stitch.
Actually, the concept is suitable for beginners, hopefully my directions are as well.
Basic Crocheted Fingerless Mitts
Materials: Louisa Harding Kashmir Baby (55% Merino Wool, 35% Microfibre, 10% Cashmere; 143 yards) 1 or 2 balls.
Hook: F/5/3.75 mm (or size necessary to obtain gauge)
Gauge: 4.5 single crochet per inch
Size: Finished mitt is 8" around and 6" long
Note: The mitts as written will very likely use all the yarn. I suggest you divide the ball before starting to ensure you have enough for both mitts, or buy a second ball.
Note: US crochet terms used throughout.
Abbreviations: ch=chain. sc=single crochet
Pattern:
Chain 38
Sc in 2nd chain from hook and in each ch across, turn (36 sc)
Ch 1 (does not count as stitch), working under both loops sc in each sc across, turn.
Repeat this row until piece measures 6" from beginning, or desired length.

Finishing:
Secure last loop, but don't break.
Lay fabric on a flat, firm surface. Lay your hand and wrist on the fabric positioned the way you want the finished mitt to fit. Attach markers above and below your thumb to designate the thumb hole.
Fold fabric in half long-wise. Beginning with last loop, seam the mitt shut by working single crochet down the open long edge to the first thumb hole marker. Break yarn.
Reattach yarn at the other end of the mitt and work single crochet up to the second thumb hole marker. Working through one thickness of fabric, slip stitch up one side of the thumb opening, slip stitch or single crochet across break of first seam, slip stitch down the other side of the thumb opening. Break yarn, weave in ends.
Turn mitt inside out before wearing.

Embellishing
In the pattern I have you work under both loops, which gives you a smooth fabric. Another option is to work under just the back loop, which will give you a little ridge on every other row. Personally, I like the ridge usually, but I wasn't in the mood for it this time.
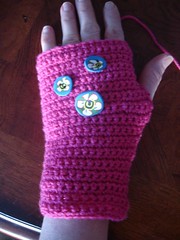
The smooth surface of the fabric lends itself to embellishment. If you are very clever you could embroider flowers or some other design on them. (I am not clever in that way and know it would probably be a train wreck if I attempted it.)
Another option is to attach cute buttons or flower or some such. Really, the possabilities are practically endless.

I have a question about your eyelet and feather sock pattern - after the gusset is done, it says something like take out markers and "continue as established" - can you explain that a bit more? Do I keep the bottom in stockinette, and the pattern on top? If so, how? Or, do I do the pattern all the way around? I'm so confused! Any help is appreciated. I'm loving the pattern, but need help to finish. My email is quiltedcupcake@gmail.com - thanks!
ReplyDelete