What a relief, right?
It's ok, you can admit it.
It's been very exciting around here, what with all the swatching, designing, and math I've been doing.
But it has also been pretty tiring.
I mean, you can only operate at that level of excitement for so long before you need some quiet time.
And, so, here you are. Quiet time.
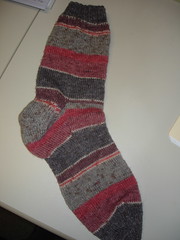
In the form of the socks I've been knitting for Hubby for like two months now.
Official Sock Dresser
Of course this is the second attempt on the sock. The first attempt was just a tad on the small size because I didn't obey the gauge. I'm glad I started over on it.
Earlier in the week I had returned the foot to the 60 row mark and wanted to see how much further I should knit.
I transferred the stitches to a lifeline to protect my US1 needles (I snapped one once trying on a sock for myself. Won't make that mistake again) and attempted to hand it to Hubby for a fitting.
In response he lifted his foot off the couch, held it in the air, and didn't move any other muscles.
I spluttered a bit, hauled myself off the love seat, and trooped across the living room to get to the offered foot.
He calmly explained (reminded me?) that his sock modeling contract includes a provision for a dresser. He's required to try on the sock in progress, but not to make the swap himself.
I could not protest because this did fit in with his pattern of behavior. When he sees me coming at him with an unfinished sock he just sticks his foot out. However, he usually is doing something requiring a little more focus than watching a baseball game, so I never questioned it.
Anyway. My spoiled husband aside, the sock needed another inch.
I was able to polish it off last night. I always think I make the foot a wee bit long on his socks, but he's never complained.
I was able to cast on the second sock last night, but not get any knitting done before bedtime.
I think maybe I'll focus on the second sock this week. Leave the complicated knitting aside for a few days.
Oh, in case you're wondering, there was no discussion when it was time for the final fitting.
Thursday, April 29, 2010
Wednesday, April 28, 2010
Bias Striped V-Neck Shell: Did the Math
On Sunday evening I sat down and crunched the numbers for the top I plan to make from the scraps left from Hubby's Striped Turtleneck.
This activity didn't take as long as planning the Schleppy Sweater did (ahem, all day!) but it did take a couple hours. Although to be fair I kept wandering away for various, unremembered reasons.
My plan had been to use the Schleppy numbers as a base and jump straight to the armhole and neck shaping.
It was not meant to be.
A Little Thing Called Gauge
Unlike the Schleppy Sweater, which was knit in the round, this one will be knit flat because of the stripes.
If I tried to knit it in the round the yarn would be in the wrong place on the second row.
As you may be aware, a knitter's gauge with the same yarn on the same needles tends to be different between in-the-round and flat knitting because of the purl stitch. Many people work the purl stitch at a slightly different tension than the knit stitch. Usually it levels out in the end.
Indeed, I got 5 stitches per inch on the Schleppy, but 5.5 on the V-neck swatch. It's a good thing I stopped to check.
Again with the Ease Issues
Fortunately I was able to use the same garment measurement numbers, even though my stitch count was going to change, because I want a similar fit. I'm keeping it "body skimming" because I want to conserve yarn.
This worked fine for the bottom of the sweater, but not so much for the shoulder area.
I didn't have to figure a cross-back measurement for the Schleppy since it was a Raglan. When I went to work the numbers this time I forgot to add 2 inches of ease and was going off my actual body measurements.
Sheesh. At least I realized what I'd done before I got too far. I think the large number of stitches I had to decrease tipped me off.
I Don't Trust the V-Neck Numbers
I feel fairly confident about the armhole shaping. Although it was a little trickier to figure out the decrease interval than I expected, but I probably unknowingly complicated it somehow.
I even decided to do some shoulder shaping, decreasing in steps, rather than just working them straight across.
No, what I'll be angst ridden about this time is the V-Neck. I'm sure it will come out all wrong.
The way I interpreted both Righetti's "Sweater Design in Plain English" and Paden's "Knitwear Design Workshop" what you have to do is figure out how wide you want the opening, then subtract an inch to account for the ribbing.
That is, if you just figure out the neck line, then add ribbing on top, you'll wind up with a much narrower opening than you expected.
I was down with that part.
Figuring out the V-decrease intervals is what almost killed me. I did a lot of flipping around in both books looking at the formulas they offer to address the situation.
Paden's is a little more straight forward as she has you divide, subtract, randomly add 1, draw a couple arrows and ta-da! there is your variable decrease rate.
I think Righetti's formula boils down to that as well, but the presentation in the book is different, which might be more a matter of the progression in layout capabilities in the publishing industry over the years.
Of course, both formulas work much better when you are using the correct numbers. (Don't ask. Oh, all right. I forgot to divide my available number of rows in half to account for not working decreases on the wrong side rows. Happy now?)
Anyway. I struggled with the formulas for a bit (with correct and incorrect numbers) and then realized they weren't working because I want to decrease 19 stitches in 38 rows, which is basically one-for-one. Every other row shaping, here I come.
See, I told you I make this math business more difficult than it needs to be.
Does Shoulder Shaping Counts in Armhole Length?
By then it was time for bed.
But something was bothering me about the top of the sweater so I took a hard look before I started typing them up.
I want the armholes to be 8 inches long. I have 2 inches of shoulder shaping.
I figured I had to work the armholes even after all the shaping decreases for 21 rows before starting the V-neck.
Both books said to work at least half an inch even at the top of the V-neck shaping for it to lay nicely, which is like 4 rows for me. (I don't have the pattern with me.)
Two of those rows will also be shoulder shaping rows.
And that's when I realized my armholes would be 10 inches long.
Sigh.
I had figured the various elements affecting the armholes (shaping decreases, shoulder shaping, and relation to the V-neck) independently of each other.
It should be an easy fix. I just have to figure out how many rows all that shaping with consume and then adjust the work even rows in between accordingly.
Piece of cake.
At least I realized before I started knitting.
Tuesday, April 27, 2010
Schleppy Sweater: It Grew!
Not in this picture. This picture is from when I finished it.
I put a rush job on washing it in anticipation of some cool, rainy weather we were supposed to get. That paid off as I was able to wear it yesterday.
Have I mentioned I don't handwash my knits? That does not surprise you as we've already established I like the path of least resistance.
So I threw the Schleppy Sweater in the machine on the hand-knit cycle in cold water with a few other handknit sweaters and multiple pairs of handknit socks.
But the Schleppy got the place of honor on the mesh drying rack. On the dining room table no less. I guess Hubby didn't have any papers to grade last week as he didn't protest at all.
After it dried it looked a little loosey-goosey. I tried it on to discover it had grown in length about an inch. It was also much softer and more snuggly and the collar fit a little better.
Surprise!
On the one hand, this growth surprised me since Hubby's Striped Turtleneck Sweater didn't grow.
However, his sweater has seams and I hear tell seams stabilize a sweater (as in preventing growth in length?).
On the other hand, it shouldn't have surprised me because I seem to remember Margaret, another staff member, saying something about Zara stretching because it's so soft.
However, I was like, "lalalala can't hear you!" And carried on knitting my sweater in the round.
Technically I think this is the first time my refusal to wash swatches has resulted in a project fitting differently than anticipated.
A Whole Inch
After taking the sweater back off I took some measurements to confirm my suspicions.
I'm sure it grew all over, but it seems focused in the long stockinette stitch portions between the collar and the waist and elbow ribbing.
The extra length in the body isn't such a big deal. In fact when I finished the sweater I secretly wished the body was a wee bit longer, but I didn't say anything. However, the corset ribbing seems to have slipped from around my ribs to more around my waist as a belt. Which just confirms I should have followed my original instinct and raised it an inch.
The extra length in the sleeves is much more noticeable. Instead of ending at my first set of finger knuckles (as planned) it now reaches to my finger tips. Although this is warmer it isn't terribly practical and kind of negates the need for the thumbhole. I am compensating by just pulling/pushing the sleeves up.
Interestingly the Raglan decrease was planned as 8 inches long and now measures 9 inches. This is consistent with the 1 inch of growth. However, I never measured the decrease line when the sweater was done. It was planned for 8 inches. I knit until all the stitches were decreased. The sweater fit. Why measure it?
Twitch
I admit it.
Part of me wants to pull it out to the body joining and shortening the sleeves.
But once I take that step how far do I go?
Do I rip the body back and raise the waist ribbing as well?
Might as well reknit the entire sweater at that point.
The urge is passing. It still fits well and looks adorable, so I think I'll live.
Future Perfect
Of course all this information is going to be very useful for future versions.
I've decided I'll keep the body the same, aside from raising the waist ribbing an inch. This will also balance the body better.
When I designed it I was only considering the body length to the armhole when I placed the waist ribbing. I forgot all the fabric above the armhole making the waist ribbing look a little low of center.
The sleeves are totally going to be shorted by 1.5 inches. I was surprised all along at how long they were anyway. I'm also going to shift the elbow ribbing up half an inch.
Oh! And I think I've figured out a way around the stretched stitches in the underarm.
When the pieces are 8 rows short of the desired length I'm going to increase 2 stitches every other row, then put them on a holder on the next row so I can Kitchener stitch them closed.
This will be like wee gussets and also give me something to aim for when joining the sleeves to the body.
I Laugh at the Inch
See that? Total learning experience which will make my future projects better.
I'm so mature.
Labels:
designing,
Schleppy sweater,
tops,
Zara yarn
Monday, April 26, 2010
Knitting Friends Rock
Because when you drop a disheveled pile of swatches in front of them, declare it is the result of your knitting efforts all week, and you still didn't get gauge, they will treat it as the travesty it is.
Which was what Pam did when I presented her with my tangled Spud & Chloe Sweater swatches on Saturday morning.
I did end up swatching with a US4 as well. Not only was it uncomfortable to work on those smaller needles but I STILL didn't get gauge.
In a fit, I then swatched with some Zara on a US 5 (or was it 6?) and also didn't get gauge.
Now I think it's not me OR the yarn. It's the pattern. grrr.
Since I didn't want to give up on the Sweater yarn entirely because it seems nice, I switched gears and swatched for Coral Crossing from the Fall 2006 issue of Interweave Knits.
You guessed it, didn't get gauge.
I've now frogged the yarn and I'm going to make the Ribbit Pattern from the Spud & Chloe blog. Cute little frog, one ball of Sweater. Stray skein of yarn problem solved.
Lending Library?
During a quite moment Pam and I scouted the shelves for other yarn options for me. I let go of the "no 100 percent cotton" rule to increase my options.
We think Cotton Classic from Tahki has potential.
To save me from having to buy yet another single skein just for swatching (trust me, my annoyance level was that high) Pam said she has a bunch of partial skeins at home and she'll let me borrow one.
She's been using them to make these adorable crocheted baby toys so I'll have to return it. But it's not like a little swatching will do it much harm.
Stay tuned.
Friday, April 23, 2010
At the Risk of Sounding Critical
I don't think this yarn is going to work for this pattern.
Which is by no means a judgment on the yarn. It's very nice yarn. If anything it's a judgment on my yarn substituting skills.
Let me start over.
Quick TravelingAnn history refresher
Back in 2004 I worked at the Patternwork's retail store in Center Harbor for one month. Then we moved. (I didn't know we were going to move when I took the job.)
During my month of employment I quickly stocked up on pattern, notions, and yarn at employee prices. I'm still working my way through some of the yarn I bought. Talk about an established hoard.
One of the patterns I bought was the Cabled Top with Cap Sleeves from Karabella Yarns #KK203.
At the time it was above my skill level since I hadn't worked cables. And the pattern is a little dense (even one of the other staff members who was a much more experienced knitter said she knew what it was trying to do it just wasn't explaining it well). But I knew one day I'd be able to conquer it.
Flash forward to last week and mom asks what I want for my birthday. I suddenly remember this pattern and convince her to buy me the yarn. I say I'll buy it, she can wrap it when she comes up for her visit, and I'll act surprised when I open it.
Selecting Yarn
The pattern calls for Karabella Zodiak, which is a 100% cotton yarn that we don't carry at Westport Yarns.
The trick is the pattern gives gauge as 26 sts/4" in the cable used not stockinette stitch, which always makes substituting tricky.
I swear to you when I was looking at the Karabella website last week it said Zodiak was 5.5 sts to the inch. Today it says it's 5 sts/inch, which means the yarn I selected should work.
Anyway. I decided not to go 100% cotton as it might hurt my hands and the consensus is cotton doesn't hold cables well.
Thinking I was after something DK/5.5 sts/inch weight I considered Zara. But Danni was like, "Did you just finish a Zara sweater? Do you want to make another one right away?" Which is a good point because there is so much nice yarn in the world I should expand my horizons a bit.
So I skulked around the store looking for something in the 5 to 5.5 st range that would cable nicely.
That brings us to the blue yarn in the picture.
The yarn I chose is Spud & Chloe Sweater in colorway 7510 (splash?). It is 55 percent wool and 45 percent organic cotton. The tag says it should be able to get gauge ranging from 4 to 5 sts per inch, depending on your needle.
Now that's a little outside my range when I thought I wanted 5.5 sts, but I thought it could work. And I used to think this pattern called for Aurora 8, which is worsted weight, and at least one person on Ravelry actually made this pattern in Aurora 8.
Danni wisely reminded me to buy just one ball to swatch with before committing myself.
And swatch I have. Frantically. Almost every night this week. And to no avail. I'm not getting gauge.
I wanted a 4 inch square but had 4.75 and it kept getting bigger.
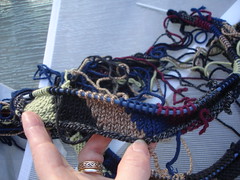
In the picture I started with a US6 did US7 then US8. I worked a double wrap, drop stitch row when I transitioned from one size to the next, which are the loose rows you see. I heard that helps prevent the different sizes from pulling in on each other and causing distortions.
I thought maybe it wasn't working because the cables were all squished up. So I soaked it in cold water for 5 minutes, rung it out, the laid it on my drying rack. If anything it got bigger. And the portions worked on the bigger needles are just getting floppy and gross.
I'd like to point out I don't usually swatch to this extent and I never wash the dratted things. I swatch until I get gauge then I plunge into the knitting. Of course, I've also never been bit by something growing considerably after the first washing. As soon as that happens I'm sure I'll be much more diligent about not only knitting a swatch but washing it as well.
Although I've been trying to remind myself swatching is knitting, I was still getting pretty ticked off. Then I finally realized I wanted to be getting more stitches per inch, not fewer, and I had to go down in needle size. Don't you hate it the way that works?
So I started over from the other end of the ball with US5. I knit one pattern repeat, bound off, reeled off a considerable length of yarn, and did it again. This way I'd have before and after dunking samples.
Not that it matters because I'm still nowhere near gauge.
The yarn is just wrong for this pattern.
I think part of it is the yarn is pretty dense. You know how sometimes you grope a ball of yarn and can tell it's fairly squishy because it's got a lot of air in it giving it bulk? You can just tell you'll be able to knit it at a tight gauge. It might not be pleasant at that small gauge, but it will reach it.
Yeah, this yarn isn't like that. Its bulk is all meat. I guess it's the high cotton content.
Which is not to say it isn't a nice yarn. It's a very pleasant yarn. I bet it will make a really nice sweater.
Just not this sweater.
I'm going to make a last ditch effort and swatch on my US4 Addi Turbos. The swatch I made on the US5 is still about 4.5 inches wide, I haven't dunked it, and it's felling pretty stiff. I'm worried the US4 might tip it into the realm of cardboard.
Tonight's the night. If I don't get gauge tonight I'm starting over selecting new yarn tomorrow.
Then what will happen to my one skein of ice blue yarn? Well, I guess I'll end up with either a blue frog or a blue rabbit from the free patterns on the Spud & Chloe blog.
Wednesday, April 21, 2010
Bias Striped V-Neck Shell: The Vision
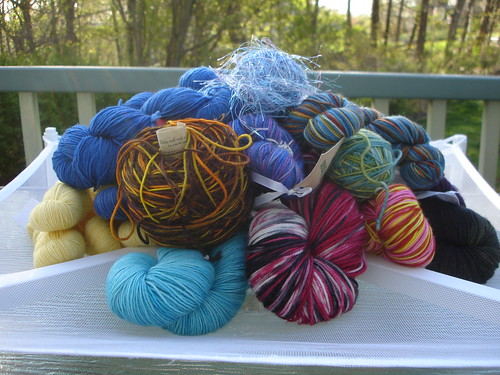
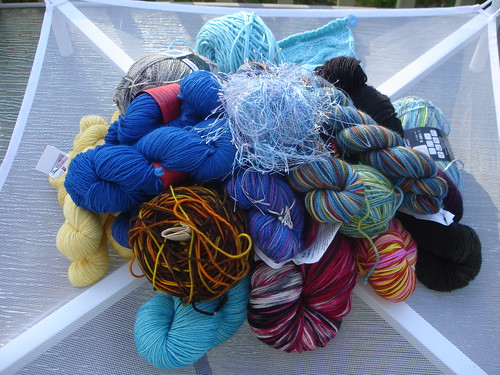
This disreputable pile of yarn is (mostly) what is leftover from Hubby's Striped Turtleneck. I say "mostly" because I did not include the partial balls in the pile since they might have rolled away.
Oh, and except for the light green one, I'll get to that in a minute.
When I finished his sweater I looked at the leftover yarn and thought, "That's a lot of yarn."
So I weighed them, did some calculations, and determined that it was just about enough for a little sweater for myself. Especially if I went sleeveless. And I can conserve even more yarn by doing a V-neck. I think. Less territory to cover=less yarn needed.
This will be a yarn hoard busting sweater at its finest!
Matching. Bleh!
The first trick was that I couldn't just repeat the stripes I used in Hubby's pattern. We've been married nine years this coming July. We're beyond the matchy-matchy phase of a relationship.
Not that we were ever into it. Although my brother has a picture of us in matching yellow Brooks Brother's polo shirts, which was a total accident.
Obviously I'd have to mix up the color order.
But, even better, I could turn the stripes on their side and they they definitely wouldn't match!
This entails some intarsia action, but I knit argyles so it doesn't scare me at all.
And if I'm going to the trouble of working vertical stripes, why not have some fun and tilt them on a bias!
My brilliance is stunning.
Having finished the Schleppy Sweater, I was ready for my next challenge. For the scary math as well as knowing I probably had enough yarn.
The Schleppy Sweater took just over eight balls of Zara and weighs 401 grams.
My little pile was equal to about six balls and weighs around 380 grams.
The mitt-to-elbow portion of the Schleppy sleeves each took one ball. If I ditched the sleeves I was in business. Although I might plan short sleeves to have the numbers on hand in case I end up having enough yarn.
But, just to hedge my bets quantity-wise, I bought an extra, fresh ball to be safe, which is the light green one. Which is the one that opened the door to that buying frenzy last weekend. (We didn't have any of the existing sweater colors in stock so I couldn't just supplement one.)
Because of my concern about quantities, and the fact that I don't have equal amounts of each color, I'm going to start with the front of the sweater so if I run out of a color it will be on the back and hopefully less noticeable.
Endless Variations
The next decision was the actual stripe sequence.
I figure I can go with the Schleppy numbers for the body to the armholes and neck.
I divided the 85 stitches by my 7 colors and got around 12. This guided my first attempt (pictured in the middle of the post). I worked a knit/purl pair of rows. Then on the next knit row I shifted everything over one stitch. Purled even. Shifted, etc.
It looked pretty good.
Just to see what would happen, I then tried working four rows before shifting. You can sort of make that out in the picture. It didn't look as graphic as I expected, so I think the two row repeat is better.
Then, because I can't be satisfied, I made another swatch with six stitch wide stripes repeating each color twice. (pictured just above)
The narrower stripes also looked nice. I think it has potential. However, it's also a little busier and I think the colors will fall off one end and have to be added to the other faster, which will really mix up the look.
The wider stripe version is more in line with what I had been vaguely imagining. (We've already gone over my inability to visual spacial relations accurately.)
I didn't want to start messing with stripes of varying width or frequency. Keep it somewhat simple.
All these striping possibilities are what I was contemplating Saturday during naptime.
Tangled Mess
Since I wanted to be able to compare the swatches, didn't want to cut the yarn, and only had one ball of several color—I was working off both ends of the balls.
The yarn turned into an unholy mess. Really a massive knot. You can see the leading edge of it in the pictures.
I was well aware that would happen. And I was ready for it. Almost as soon as I started knitting the first swatch I knew I was going to rearrange the color sequence. And if I was going to rip it out anyway, why bother keeping things neat?
I'm sure I'll change my tune when I'm sitting on the couch picking it apart tonight.
Because of that, don't expect to hear about the Bias Striped V-Neck Shell for a little while.
First I have to untangle the yarn.
Second I have to decide how deep the V should be.
Third I have to do the scary math.
It's an involved business, this designing sweaters stuff.
Labels:
Bias-V,
designing,
Hoard (stash),
stripes
Tuesday, April 20, 2010
Yarn Hoards and Dragons
We had a clearly divided day on Saturday.
We woke up early and shot out of the house to run some errands and go out to breakfast. We were so efficient we were home by lunchtime.
Then Hubby had a headache, which is usually my trick, and decided to lay in bed while he watched the Yankees game (as opposed to on the couch).
After a while I decided it was naptime and snuggled down next to the man I love in our big comfy bed.
(If you knew me in person you would know we just got a new bed over March break and it was quite a to-do that you are sick of hearing about. So there is quite a lot of weight to that "comfy bed" statement.)
But instead of falling asleep I was thinking about the many variations available for the striping sequence for the sweater I'm designing.
Suddenly Hubby reached over an mussed my hair.
My eyes popped open. "What's that all about?"
He laughed and said he couldn't resist because I looked so cute with a content little smile.
He laughed even harder when I said I was thinking about my yarn.
(This is by no means all my stash. It's just a representative pile that I could pull together quickly this morning.)
My Hoard. My Precious.
I went on to explain that it is customary to call the yarn you own but aren't using your "stash."
But I'm going to start calling mine a "hoard" as it is more reflective of the treasure it is.
Hoard is also more in line with my image of myself as a little dragon perched atop a pile of gold.
roar!
I'm not sure what kind of dragon I'd be. Probably a red one. I think those are the small, cranky ones. Or maybe a bronze, since I'm a brunette.
The problem is I've forgotten my dragon classifications. Scandalous, I know.
And then there is the issue of do you follow the Dragon Lance classification or the Pern one?
It's all very complicated.
All I know for sure is you should back away from my yarn. roar!
And try not to step on my tail on your way out, ok?
Labels:
Hoard (stash),
misc
Monday, April 19, 2010
Stop Me
Seriously, I need you to reel me in on this one.
Because even I know this idea probably isn't good. And when you know your own idea is kind of whacked, well that's a bad place to start.
I want to make a Rainbow Bright version of the Schleppy Sweater.
Color/Number Alignment
Think about it. It would be almost perfect.
The Schleppy Sweater took just over eight balls of yarn.
There are seven colors in the rainbow (red, orange, yellow, green, blue, indigo, and violet).
I can get six of those colors in yarn (no indigo). Two of the colors would have to be a little more represented (probably red or blue, since I like those, although red and purple would make more sense since they the ends). Unless I wanted to introduce pink, powder blue, or lavender, but I really wanted to stick with the primary colors. But it would basically be one for one.
And I'm not talking narrow little stripes dancing happily up the sweater.
I'm talking big blocks of color!
Cast on with the red and knit until it runs out (hopefully at a side seam). Switch to the orange and knit until it runs out. And on up the sweater to the collar.
Colors Balanced
It would be my Chakra Sweater (chakra wikipedia link).
oooohmmmm
As obnoxious as it might be I feel like I could totally carry it off. First, I'm not above sometimes making a spectacle of myself clothing wise. Second, on first glance I still look like I'm in my 20s, so I don't always have to dress my age.
The thing is, I have to make up my mind about this soon. Strike while the irons hot, as it were.
You see, there is one, lone ball of bright melon orange Zara on the shelf at Westport Yarns. And I can't see us reordering that color any time soon.
Once it's gone my dream of a rainbow sweater will be gone with it.
Labels:
designing,
Schleppy sweater,
tops,
Zara yarn
Friday, April 16, 2010
Bye-bye Sock
I found Hubby's tie clip!
And it wasn't in a pile of puppy poo. It was stuck to the seatbelt in the SUV.
Frankly, I'm surprised he missed it as it was fairly close to the clip and I know he wears his seatbelt. Anyway, we swapped cars this morning and I found/felt it as soon as I tried to strap in.
I don't know which is more exciting: that I found the clip or that I can stop examining Baru's droppings!
Actually, what is exciting is that I can stop watching the dogs for signs of distress thinking they ate an inappropriate metal object.
Sock Sizing
Ok, so, knitting. Hubby might have regained a tie clip but he has unknowingly lost a sock.
I always like to have a sock on the go, even if I'm not actively working on it. Kinda like a knitting security blanket.
I started these socks for Hubby back on March 6, which was the day before I started the all consuming sweater. Considering I can usually knit a pair of socks in two weeks and this one was still missing a toe, I obviously haven't been giving them much attention.
I settled down Wednesday to start busting them out before the next all consuming sweater comes along.
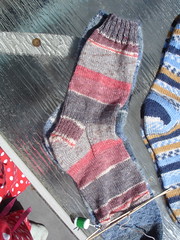
The foot was 60 rows from the pick-up, which meant it should be time to start the toe shaping.
Since I didn't want to disturb Hubby, who was very busy with school work, I trotted upstairs to compare it to other socks I've made him.
What Gauge is This?
Imagine my surprise when the new sock was considerably smaller than the old socks!
I mean, I think the size difference looks considerable.
Especially since the rouge one and the blue one (not the blue with orange) are both made from Austermann Step yarn. (The blue/orange pair is Trekking.)
The new sock was 64 stitches, which is what I used for the last pair of socks I made him out of Berroco Sox (dirty, so not available for the photo shoot). Those socks fit him fine. The socks in these pictures are 68 sts each.
I was so baffled that I went back downstairs and headed straight for Hubby. Either it was the unfinished sock in my hand or the look on my face, but he just stuck his foot out from under the table without even pausing in his grading.
Oddly enough, the new sock fit. Ok, it seemed a bit snug, but it fit. A testament to the stretchiness of knit fabric.
This is so cute. I asked Hubby how it felt. He said there was something wrong with the toe because he couldn't feel the fabric! bwahahaha. I said, "There isn't fabric to feel. I haven't finished it yet." Which shows you how deeply focused he was.
I debated going forward, but I just couldn't bring myself to do it.
I checked the gauge and I'm getting 8 stitches per inch. I should have cast on 72 stitches.
I considered going with the 68 the other pairs used, but thought I'd play it safe and obey the gauge.
So I ripped out the whole dang sock and started from scratch.
I had a similar fit issue with the Green Step socks I recently finished for myself. They fit, but seemed snug. Since they were for me (and I'm lazy), I just went with it.
Part of me wants to blame the yarn, "They've changed it somehow." But I know that's wrong. This red skein was purchased at the same time as the blue one.
I guess it just goes to show, you should always check your gauge and calculate your cast on fresh even if you've worked with the yarn before.
Thursday, April 15, 2010
Like a Scene from 'Marley & Me'
I'm home with a migraine today. (Starting to feel a little better, thanks for asking.)
Shortly after Hubby left for school he called me and said he left his tie clip on the bedspread. He wanted me to grab it "before one of the dogs ate it."
I didn't think a tie clip would be appetizing enough to eat, but these are dogs that chew up Pelligrino caps and once ate part of an empty Guinness can, so maybe he had a point.
Of course the first thing I had to do before I could start looking was kick Baru off the bed.
Hubby was like, "Baru is up there? It's already gone." He sounded really upset.
Still I snapped, "Then it will come out in the yard." Because, you know, I was trying not to hurl from the shooting pain of my migraine.
I'm feeling a little better now. I've torn apart Hubby's side of the bed, hoping it would be in the cover or on the floor. No such luck.
Now the thing is, if they did eat it finding it in the yard won't be so easy.
Samson is very discreet and always goes poo behind the bushes. This will make it hard to get to his poo.
Baru, on the other paw, poos whereever the mood takes him. Fortunately, Baru is also the more likely culprit since he is a glutton and was upstairs alone for a while this morning.
We were outside just now (beautiful day if the sun wasn't driving rusty nails into my eye) and I was wandering around (in my pjs!) breaking up any fresh looking poo with a stick. Very dignified.
Still no sign of the tie clip.
I'm hoping it turns up in Hubby's pocket or book bag or something.
But just to be safe I have to ask: How long will it take for them to digest it?
Wednesday, April 14, 2010
Stash Enhancement!
The problem with having finished the Schleppy Sweater (oh, didn't I promise you wouldn't have to hear about it after it was done? sorry!) was that the magpie part of my brain was like, "I can buy new yarn now."
Seeing as I'd used up a sweater's worth of yarn.
Heaven forbid the stash get depleted at all.
I did say the yarn diet was diverted.
My plan was to buy just one little ball of Zara for the next sweater I'm going to design.
But you know how that goes. Once the door to purchasing yarn was opened a whole bunch of other skeins rushed in. It's like trying to eat just one potato chip or piece of chocolate.
Koigu KPPPM
In colorway P460 dyelot 170, shown above. Because I'm a sucker for blue.
And this looks like a pretty stone.
I thought I'd waxed poetic about yarn with stone like colors before, but it wasn't jumping out at me. I thought it was when I bought the Mountain Colors Bearfoot that I was using for the Peacock Socks.
Anyway, when I was little I had a storybook about a girl who had to move and was really sad because moving sucks. She had this rock that looked really dull and normal when dry, but if you put water on it the colors came to life making it beautiful. It was like a magic rock. And it helped her make friends in her new neighborhood.
Couldn't tell you the name of the book, but I really liked it. And sometimes blue and brown yarn like this makes me think of that book. So I had to buy this yarn.
Another factor was that last month we got in a supply of that Cascade Heritage sock yarn. Nice solid colors and I was debating using it for argyles for Hubby. But I was trying to be good and not buy yarn. Well, over the weekend the yellow, which I liked best and was going to be my base color, was gone. So I got all pissed off and bought the Koigu before it was all gone too.
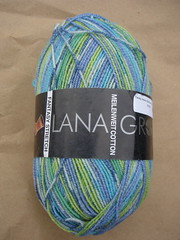
Lana Grossa
The next two yarns are Lana Grossa Fantasy Stretch, which is a cotton/wool/polyamide/elite blend. It seems to have a little elastic in it (the elite?) because it has some spring to it.
The brown/grey/white one is colorway 8352, which is for socks for Hubby. It looked like boy colors to me. I don't know if he will like cotton socks. We'll see what happens.
The green/blue/white one is colorway 8336, which is for socks for me. Obviously.
As I mentioned once before, I feel obligated to buy cotton sock yarn to encourage manufactures to keep making it.
I wonder if I should work Hubby's cotton socks with a princess sole to?
Labels:
cotton,
Hoard (stash),
Koigu,
socks
Tuesday, April 13, 2010
Done: Schleppy Sweater!
Betcha didn't think you'd ever see that post title, did ya?
As you might have surmised, this means Hubby did not make me do yard work on Saturday. This allowed me to just park myself on the couch and make one mighty push to finish to the exclusion of all else. (Well, aside from trying to catch up the laundry.)
And not only is the sweater done—it fits! And fits rather well, if I do say so myself.
Really, the whole "fitting" thing was up in the air for me the entire time. I guess I should have trusted the math. Or the process and the math.
This means I really do know how to measure myself correctly, measure a gauge swatch, do a bunch of scary math, and end up with a decent sweater.
Do you know what else it means? I'm feeling rather smug and insufferable at the moment.
I understand this is when some knitting or other yarn related disaster will strike.
Oh, hey does that horrible tangle last night in my skein of Austermann Step I'm using for hubby's socks count? I hope so.
It also means that I'm already plotting my next self-designed sweater. hehehe.
But I have to swatch first. And I'm trying to quickly read Paden's Knitwear Design book so I can cross reference it with Righetti's Sweater Design in Plain English.
You know, add to the confusion a bit.
Project Stats
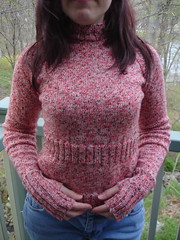
(Does it matter that I'm not consistent with that subhead?)
Project name: Schleppy Sweater
Source: A TravelingAnn Designs original. Making it unique and one of a kind! wheeeee!
Yarn: Zara Print Tweed in colorway 5110. It took 8 balls and a wee bit of a ninth, which really ticked me off. I had to dip into it for the collar. It's possible that if I hadn't done a mock turtle neck I wouldn't have needed the ninth. Of course, if I hadn't done the integrated mitts I might not have needed it either.
I weighed the sweater using the kitchen scale (what? Like you haven't?) and it was 401 grams. (This will come into play for my next sweater.)
Needles: Us 3 and 5
The most brilliant part of the sweater, aside from the fact that it fits and looks good, is those integrated fingerless mitts.
So fun to be able to pull them down when I need them. Ahh, instant warmth.
It took me about a month to make, including the initial math crunching. It might have taken less time if I hadn't knit three sleeves.
Collar Contortions
The collar took me a lot longer than you would have expected.
Or not, since I always have to do things the hard way.
I have a wee bit of shaping in the front so it wouldn't choke me. That is, instead of working the front and back the same, I put a dip in the front.
Since I don't like picking up stitches at necklines, and I was working in the round anyway, I decided there must be a way to work short rows or something.
Despite the fact that I know how to work short rows from my sock knitting experience the collar was a train wreck.
(The picture is on the way back out. It looked worse in person.)
I put the center six stitches on a holder, then worked flat back and forth, then tried to work back up. Ick!
I think the problem was I didn't wrap and turn. Instead I either K2Tog, K1 or P2Tog, P1 (depending on the row, obviously) then turned, slipped the first stitch and worked the row. This decreased the stitches, but gave me nothing to pick up on my way back out.
When I saw how icky it looked I just yanked it right out. It was only 12 rows, after all, and I'd wisely strung another lifeline before I started.
For the second, final, attempt I just bound off the stitches like a normal knitter. It was very easy to pick up as it was five stitches on one side and six on the other (I worked one row even in stockinette stitch and decreased the extra stitch away before starting the ribbing). So I could have saved myself some trouble if I'd just done it the regular way off the bat.
I did not change to the US3 for the collar ribbing since I didn't want it to be too tight.
Not that it mattered.
I bound of the last stitch, slapped a locking stitch marker in it, excitedly tour of my pajama top, pulled on the sweater, and bonk! It wouldn't go over my head.
I gave it a little tug, thinking perhaps a lifeline was hooked.
Nope, the bind off was too tight.
I must have made a little whimpering sound or other sound of annoyance because Hubby commented on the fact it didn't fit. (If he laughed I managed to block it out.)
It was a simple matter to pick out the bind off and switch to Elizabeth Zimmerman's Sewn Cast off as documented in this Knitty.com article.
Me, Being Slick
Which usually leads to trouble. As evidenced by the collar business.
Remember how the other day I did all that crazy stitch jiggering to avoid having to sew shut a hole in the armpit?
It worked, but I'm not sure it was the best solution.
Oh, it feels fine when I'm wearing it, but I was examining it in the mirror and it doesn't look terribly secure.
The stitches look rather stretched and I wonder if that will put extra strain on them and shorten their lifespan. I can see them snapping and the side unraveling. There will be tears and I'll have to rip back the yolk, picked the dropped stitches up, and knit some kind of gusset.
This is, however, what the math told me.
I think it would have been better to have bound off stitches, or some little gusset thing, or something to relieve the strain in that area.
When I make another one—because I really want to. Several actually. I can do a striped one and maybe a solid one with cables, and....—I'll have to address that. Binding off doesn't seem the answer, so I'll have to figure out a gusset.
Ok, I believe that is everything. I wore it yesterday and everyone said it was lovely. I had it at the store Sunday, just to show off, and everyone there liked it as well.
Would you like to know a secret?
I haven't finished weaving in all the ends. I wore it and all the ends aren't woven in. I'm such a rebel.
I think it's going to take as long as knitting the thing did. I got all the body ones done, but the sleeves are still waiting. I'll have to focus on that tonight.
Labels:
designing,
Schleppy sweater,
tops,
Zara yarn
Friday, April 9, 2010
Schleppy Sweater: Plugging Away
I'm on row 26 of the yolk.
Still over 200 stitches on the needles.
In around 20 rows I'll start the neck shaping.
I endure.
If the weather is nice the weekend I think Hubby is going to make me do yard work with him.
That will cut into my knitting time.
Still over 200 stitches on the needles.
In around 20 rows I'll start the neck shaping.
I endure.
If the weather is nice the weekend I think Hubby is going to make me do yard work with him.
That will cut into my knitting time.
Labels:
Schleppy sweater
Thursday, April 8, 2010
Schleppy Sweater: Preview
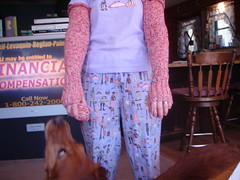
I was prancing around in my unfinished sweater again last night, much to Hubby's consternation.
This time instead of transferring the project to a yarn lifeline I was able to spread the stitches out over the three intermediate cords from my Denise Interchangeable set. The cords did hold the opening out like a hoop to a degree, rather than allowing the fabric to drape naturally, but it was good enough to give me an idea of fit.
"I don't understand," Hubby said as I swanned through the bedroom. "How high is this neckline going to be?"
Oh, it's going to be a turtle neck. I'm just trying to test the fit.
He balked when I thrust the camera at him and initially refused to take my picture.
"It looks goofy!" he protested. "You can't put a picture of it on line looking like that."
I assured him that he just doesn't understand because he doesn't knit. People need to see my progress!
1/4
At this point I've worked 17 rows of the yolk. According to my admittedly questionable calculations I'm supposed to work 60 rows total. So I'm about a quarter of the way there.
The sleeves are actually reaching much higher up my arms/shoulders, but since they have no support they are flopping down in the picture.
I can't decide if I'm concerned about this or not.
They probably need more fabric since they have to go up and over my shoulders while the front and back of the body are just going straight up.
Also, the sleeves are getting smaller quicker than the body, which will probably play into how they all interact as the knitting moves along.
Soon. Soon the sweater will be done. I just have to keep plugging away.
Labels:
Hubby,
Schleppy sweater
Wednesday, April 7, 2010
Schleppy Sweater: Peak-a-Boo
Even before I reached the row where I was supposed to join the sleeves to the body I knew I was going to have a problem since I'm not binding off any stitches for the underarm.
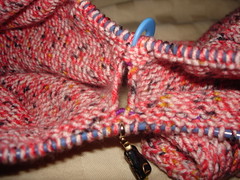
(Photo: this is looking at it from the inside. I believe the body is on the left and the sleeve is on the right.)
This means there is no gusset leaving the door open for a hole in the armpit. Also, there were no little flat spots to line up.
The second problem was easier to overcome. I put the sleeves on, made sure the ribbing was straight, then clipped a removable stitch marker to the center of the armpit.
I used those stitch markers as a guide to match the center of the sleeves to the side of the body.
I thought I'd address the first (hole) problem when I was in the process of joining all the pieces together, but I ended up flustered and forgot.
Mind the Gap
Fortunately, I only worked one row after the joining and then ran a lifeline. Then was dragged away to play pinochle. (shudder)
When we got home on Sunday I took a hard look at the situation.
As Lucy Neatby would say, those were some unhappy stitches.
Instead of being snugged up next to their neighbors on either the body or the sleeve as they wanted to be they were being pulled in different directions. It reminded me of the little hole you get at the top of the sock gusset after picking up the heel flap.
I knew the hole was exacerbated by the proximity of the needles. And it occurred to me it might be less noticeable once the sweater was done. But I also knew I'd probably have to go back and sew it shut some how.
Either way, it was unacceptable and had to come out. Good thing I had that lifeline in place!
Fancy Stitch Swapping
I put the front and back of the body on separate needles.
Then I divided the sleeves over two dpns each.
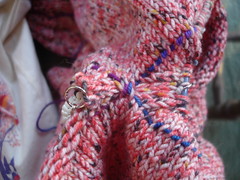
(Photo: this is looking at it from the outside. If you click on the picture it should take you to a bigger version on Flickr. The blue/purple yarn is my lifeline. It will just pull right out.)
Happily, everything was already lined up properly because of the lifeline.
Ok, stick with me, it didn't occur to me to take pictures while I was knitting.
Have you ever been working in the round and done that trick where you move the first stitch cast on off the left hand needle to the right hand needle, then pull the last stitch cast on off the right hand needle over the moved stitch as though you were binding off but keeping it on the left hand needle? Then worked the formerly last stitch as your new first stitch?
It helps prevent that little gap on your joining row.
Well, I did something like that.
When I got to the end of the front of the body, instead of working the last stitch I slipped the last stitch on the sleeve (second dpn) to the body needle, then moved the last body needle over to the dpn.
Then I knit the moved sleeve stitch.
Then I moved the first stitch for the sleeves off the dpn over to the back body needle, and pulled that first body stitch over to the first sleeve dpn.
And I knit around like normal. Repeating the process for the other sleeve.
Yes, it was as fiddly as it sounds and the stitches weren't happy being yanked all over the place, but I bent them to my will!
There is a little X in the underarm now.
Haute Couture
After fixing the gaps I worked a few rows then couldn't resist trying the sweater on to see if it really had a fighting chance of fitting.
I transferred everything to a second lifeline and squirmed into it.
"Um, is that all there is?" Hubby asked, looking at me sideways. "Because it's kind of revealing."
The sleeves came up my arm and the body just barely covered the important parts. It was basically a strapless sweater. Stylish, but not very practical.
He confirmed that I should NOT take a picture of it in that condition for the blog. Sorry.
I guess it fits. It's a little hard to tell since there is nothing to anchor the top. I might try it on again in a few more rows. I might be able to take a picture of it next time, since it will be less revealing.
Now I'm just slogging through the yolk and raglan decreases. It felt like each row took a really long time to work, and then I realized I started with 300 stitch. So, yeah, that would take a long time.
I'm not expecting any more knitting excitement until I get to the neck shaping about 40 rows from now.
Tuesday, April 6, 2010
Chomp!
It was a dropped food bonanza for the pups this morning.
First, Bread
We buy this healthy, sprouted wheat, preservative free stuff that goes moldy by the time you get it home from the store. Since we mainly use it for toast, we keep it in the freezer.
We're at the end of the loaf and the slices were stuck together but good.
So I used the spatula to pry them apart.
The slice resisted, the when POP, flew into the air, then plummeted toward the ground only to bounce off Baru's head and land at his feet.
I made a play for it, but I knew it was a lost cause. He was in a much better position.
He promptly scarfed it down, despite the fact that it was still frozen.
Since Samson was jealous I had to pop off the heel and hand it over.
Then the Blueberries
As I fished around on the back of the top shelf to get the cantaloupe out I accidentally knocked a wee container of blueberries out.
It hit the floor, popped open, and spewed berries everywhere.
Since blueberries are still rather expensive this time of year I had a mad scramble to pick up as many as I could before the furry vacuums moved in.
Hubby was laughing, cheering me on, and updating me on the pups' progress.
I felt like I was on a game show.
I don't know my saved vs. lost ratio, but I felt like I did pretty good.
As I returned the berries to the fridge Samson started scoping out the bowl of cantaloupe. Fortunately it was still securely covered with cellophane so he couldn't get into it.
Over the Weekend
I did not get as much knitting done as anticipated despite the three-day weekend.
We went up to my in-laws' for Easter. This does not normally cramp my knitting style considering my mother-in-law is the one who taught me.
However, it was not meant to be.
Pinochle Sucks
The power went out Friday night shortly after dinner. (Power outages, story of my week.)
My FIL busted out a propane camping lantern and my MIL decided it was the perfect opportunity to corner me and teach me to play pinochle.
To say that I've been avoiding learning how to play pinochle for all nine years of my marriage would not be an exaggeration.
My MIL assures me they attempted to teach me back in 2000 when Hubby and I were dating, but I've managed to completely block out the memory. I did have a pretty bad cold at the time, so maybe it's cold medicine induced amnesia.
Anyway, it wasn't pretty. Or fun. Pinochle has way to many moving parts. As I repeatedly informed Hubby, rather shrilly, I am not cunning enough for card games. And having the 10 be worth more than the king is the silliest thing I've ever heard.
It didn't help the situation that my loving husband kept laughing at me when I made a mistake, which probably contributed to me being shrill. At least it also got him in trouble with his mom.
Needless to say, Hubby ultimately won the game.
Ratty Grey Mohair
The end result was I had bad dreams about pinochle that night.
I was in a yarn store. The only way to buy stuff was to win hands of pinochle. But the only things for sale were other people's works in progress and none of them were my style.
The only one I really remember was a caplet or shawl thing, perhaps, out of grey mohair. It was on a coat hanger for some reason, with the working yarn trailing off it.
It was all very traumatic.
Saturday Was Better
Hubby and his dad went to the dumps (i.e. the town landfill) and ran some other errands, leaving my MIL and I free to relax and knit.
She was knitting a Christening blanket in a lace pattern that I've seen before.
I had previously finished the left sleeve of the Schleppy Sweater. I moved on to open the bind off on the right sleeve and knit the handful of rows required to work the final increase and bring the whole thing up to 18 inches (measured from the correct marker!).
You might remember that the body shrunk about half an inch on me. I transferred the stitches from the lifeline back to the needles and then worked a few more rows to bring it up to 13 inches.
Then I joined the whole mess together and promptly began running a new lifeline, just to be safe.
More Pinochle?!
I didn't get very far when hubby dragged me kicking and screaming back to the table for another game of pinochle.
I decided it was best to approach the situation with the mindset of being cannon fodder. I thought it would make it easier to handle.
Didn't work out, of course.
The one time I got a hand that I thought was good causing me to bid aggressively and win the three cards in the kitty (which didn't help me at all), my loving husband proceeded to take more tricks. The end result being that I didn't score enough points causing me to loose the hand and go down the 230 points I'd bid.
You would think it would have occurred to him to throw the hand, allowing me to win, boosting my confidence, and perhaps getting me interested in the game. But he couldn't suppress his competitive streak.
After that I went into major princess Pollyanna mode throwing down cards as I waited petulantly for the game to be over.
As you might expect, Hubby won, again. My MIL tried to assure me that there was nothing we could have done against the great hands he was dealt, but I was impervious.
We discussed playing some other game, but decided it was too late to get into anything and I was finally able to slink off to the couches and pout.
Sunday for Socks
It's a four hour drive, so we hit the road after lunch.
I didn't like the way I'd joined the sleeves to the body of the sweater. Because of this I packed it in the back with the pups and left the socks I'm making for Hubby up front.
I was able to turn the heel, pick up along the heel flap (which wasn't easy in a moving car), and start the gusset decreases before we got home.
The sweater is a post for another day.
Labels:
car trip,
misc,
Schleppy sweater,
socks
Friday, April 2, 2010
Schleppy Sweater: Tricky Tapemeasure
I made it through all the increases on the left sleeve last night bringing my stitches to 66.
Then I worked three more rows to bring my row count to 65 (actually 165 since I don't have a three digit row counter), which should have been 18 inches.
This was very exciting.
I laid the sleeve out on the coffee table and measured it. 22 inches.
How the heck did I overshoot it that much?
Oh, I'm measuring from the cast on edge, which includes the mitt length. I should be measuring from this stitch marker.
I moved the end of the tape measure and the sleeve was then 16 inches.
Two rows short of the goal.
What the heck? 135 rows should be 18 inches based on my row gauge. What is going on?
I couldn't work two more inches the sleeve looked so long already. I tried it on.
It reaches very far up my arm. Almost into my armpit.
How far into my armpit is this damn thing supposed to go? I've already said it's not an alien skin costume! I don't want it to be skin tight.
I measured myself correctly. I did the math correctly. But it's not working out! How the hell am I supposed to figure this out myself?! What I need is a seamstress.
Where the hell am I supposed to find a seamstress!?
Ok, calm down. Who in my family sews?
My Mom
I'm pretty sure she used to make clothes when I was little. I definitely remember she made stuffed animals.
Once she made me this awesome alligator. His body was corduroy and his mouth was open so she used that zig-zag tape for teeth. And the pupils on his button eyes were the silhouette of a cat sitting up.
But a stuffed alligator won't translate to sleeve fit. Besides that was back in the 1970s, she probably won't remember.
My Cousin A
But I don't know if she makes clothes or if her talents are limited to last minute elf hats for the Christmas pageant.
Besides, it's Easter this weekend. I won't be able to get in touch with her. If she isn't in church then she is delirious from lack of food and sleep from spending so much time in church.
My Aunt T in CA
Now she is a seamstress. Her talents are very much in demand for sewing vestments for priests.
But take all that stuff I said about my Cousin A and Easter, double it because Aunt T is a priest's wife, and add a three hour time difference.
Obviously I'm on my own.
Wait a minute.
I'm measuring from this stitch marker at the top of the ribbing before the stockinette stitch starts.
That is the top of the cuff. Why would I put a stitch marker there? I don't remember. But I did it on both sleeves.
I should be measuring from this other stitch marker that indicates the row where the mitt stops and the cuff starts.
Let's see....from there the sleeve measures....18 inches.
um...
ok...
Forget everything I just said.
Labels:
designing,
Schleppy sweater
Thursday, April 1, 2010
Schleppy Sweater: Say That Again?
You know how sometimes when you are learning something you can read the instructions or have someone explain it a dozen times and just not get it?
Then someone else comes a long and explains it just a little bit differently and it suddenly clicks into place?
Well, I had that happen this morning. Not that it does me much good at the moment.
Got My Book
Yesterday I stopped at Westport Yarns on the way home from work and picked up my copy of Shirley Paden's new book "Knitwear Design Workshop".
The other staff members were circling it like sharks. Turns out some copies came in damaged and they were waiting on replacements. In a situation like that the priority is customer orders, of course, the sales floor, and then staff orders. Apparently someone kindly decided that my need to have a copy was more urgent. Probably based on my current feeble (pathetic?) attempt at sweater design.
I'll do a review after I've had a few days to look at it, but I can tell you a few things right off the bat from my breakfast perusal.
Again With The Ease
It has a really nice table of contents. The sections are broken down and each subsection has a page number listed.
You might not be surprised to hear that I flipped straight to the section about ease.
There I read that "standard fit" is 1 to 2 inches of ease. Of course I had just figured that out for myself last week so I wasn't terribly impressed.
Then I read the commonly heard advice to "measure a sweater you like and use it as a guide" and a light bulb went on. Most of the sweaters I own, and all the sweaters I've made, are close fitting. So of course when I measured them to use as a guide I ended up designing a close fitting sweater!
Therefore, I would alter that classic advice to be "measure a sweater you like with the fit you want and use it as a guide." This way it is spelled out for ninnies like me. You want to design an oversized sweater? Well use an oversized sweater you like as a guide. So simple, yet I didn't figure it out until now.
The irony is I have this size medium hand-me-down rugby shirt making it pretty big on me that I tend to reach for when I'm cranky. It is kind of what I had in mind when I decided to make the Schleppy Sweater. Only every time I thought of measuring it I thought, "Naaa, that's too big."
Some part of my brain was working against me. Although I did say I want this sweater to be a little tailored/attractive and I don't think the ruby shirt interpreted in yarn would have been.
Raglan Lightbulb
Then I flipped to the section about Raglan shaping. There was a call out box with bullet points.
One says that the sleeves and body have to have the same number of rows, but not necessarily the same number of decreases.
I had to read that sentence several times since my brain kept refusing to acknowledge it.
It meant that all of my panic when I was first knitting the sweater was unnecessary. I didn't have to rework the numbers after all.
I thought you had to have the same number of rows and work the same number of decreases at the same time on both the sleeves and the body. In all my scenarios to avoid recrunching the numbers it never occurred to me to try to decrease more stitches in the sleeve proper (I debated underarm cast offs).
Of course I don't know what that would do to the look of the decrease line. One of the nice things about Raglans is that nice sharp line along the decreases and increasing or decreasing the frequency might mess it up.
Oh well, at this point I'm not going back to the old numbers.
But next time, next time things will be different.
Labels:
books,
designing,
Schleppy sweater
Subscribe to:
Posts (Atom)